TTM57 MKII
SETUP
Connections

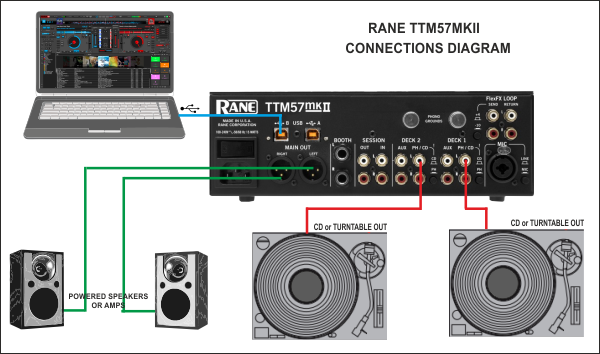
- Connect your computer to USB A (or B) port at the rear panel of Rane TTM57 MKII.
- Connect your Left deck’s RCA cables to ANALOG INPUT DECK1.
If it’s a CD player, select CD with the switch above the input jacks.
If it’s a turntable, select PH (Phono) with the switch above the input jacks. Secure the ground wire to a Phono Ground terminal. - Connect your Right deck’s RCA cables to ANALOG INPUT DECK2.
If it’s a CD player, select CD with the switch above the input jacks.
If it’s a turntable, select PH (Phono) with the switch above the input jacks. Secure the ground wire to a Phono Ground terminal - Set the SOURCE selector for DECK 1 to USB-A (or B if the USB B port is used).
- Set the SOURCE selector for DECK 2 to USB-A (or B if the USB B port is used).
- Connect the Rane TTM57 MKII with AC power using the provided cable and power on the unit
Drivers
Windows: Download and install the necessary ASIO drivers from https://www.rane.com/downloads-legacy#ttm57mkii
Mac OSX: Download and install the necessary CoreAudio drivers from https://www.rane.com/downloads-legacy#ttm57mkii
.
.
VirtualDJ Setup
Once VirtualDJ 8 is launched, a Login Window will appear. Login with your virtualdj.com account credentials.
A Pro Infinity or a Pro Subscription License is required to use the Rane TM57 MKII. Without any of the above Licenses, the controller will operate for 10 minutes each time you restart VirtualDJ.
http://www.virtualdj.com/buy/index.html

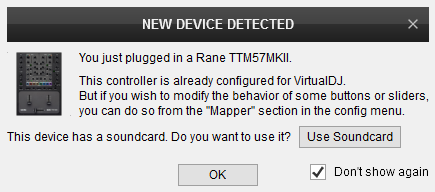
Click on the “Use Soundcard” button and VirtualDJ will automatically create and apply the pre-defined audio configuration using the built-in audio interface of the Rane TTM57 MKII.
Click to OK.

The unit is now ready to operate with VirtualDJ.
MIDI Operation
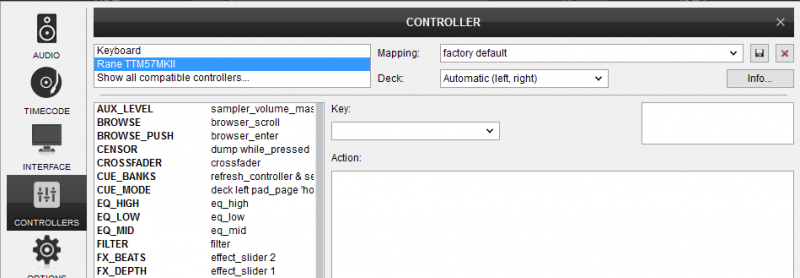
The factory default Mapping offers the functions described in this Manual, however those can be adjusted to your needs via VDJ Script actions.
Find more details at
http://www.virtualdj.com/wiki/VDJ8script.html

Audio Setup
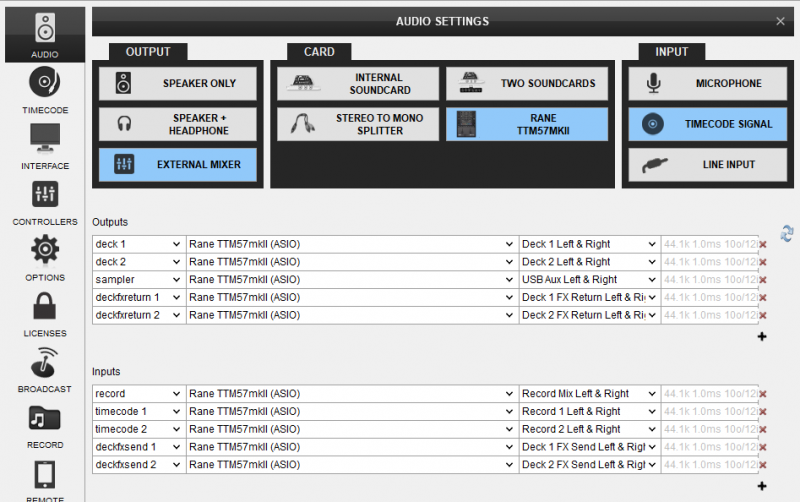
The unit has a pre-defined Audio setup and a special button in the AUDIO tab of Config to provide that. Alternative setups can be applied in the same window.

Timecode (DVS)* configuration is pre-configured (see Advanced Setup for more details).
*requires Pro Infinity or Pro Subscription License http://www.virtualdj.com/buy/index.html
For further software settings please refer to the User Guide of VirtualDJ.
http://www.virtualdj.com/manuals/virtualdj/index.html Layout


