Performer
ADVANCED SETUP
CONTROLLER SETTINGS
A few useful settings are available when the Rane Performer is connected.
Go to VirtualDJ Settings -> OPTIONS tab -> CONTROLLER sub-category and find the following settings..
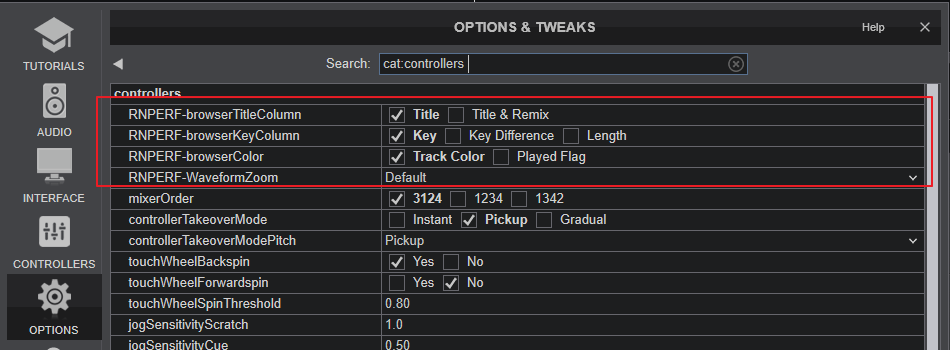
- RNPERF-browserTitleColumn : Select what will be shown on Title Column of Rane Performer Browser, Title (default), or Title & Remix
- RNPERF-browserKeyColumn : Select what will be shown on the 3rd Column of Rane Performer Browser view, Tracks' Key (default), Key Difference or Length
- RNPERF-browserColor Select whether the color of a line on Rane Performer browser view will display the color of the track, or red for the played Tracks
- RNPERF-waveformZoom Select one of the 4 available Zoom levels for the Waveforms displayed on the Rane Performer screens
VIRTUALDJ EFFECTS
the Rane Performer has 2 dedicated USB FX Send/Return channels and those are included in the default Audio Setup (when you click on the RANE PERFORMER) button at the top.
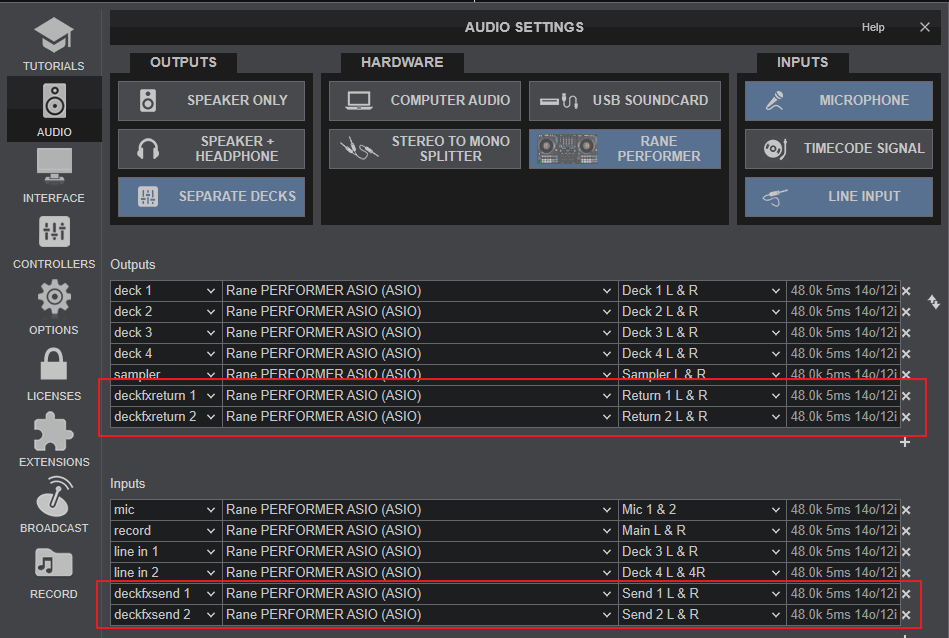
These channels allow Post-fader software Effects, but those are available only when the FX unit of the Rane Performer is at the Software mode and the FX Paddles are used to trigger the Effects, therefore the Effects triggered from the skin of VirtualDJ or other devices will not act as Post-fader Effects or may not affect the sound at all.
- When the FX unit is set to Hardware mode, VirtualDJ Effects applied from the skin or other device will affect the sound of the Deck, but will not act as Post-fader.
- When the FX unit is set to Software mode, VirtualDJ Effects applied from the skin or other device will not affect the sound of the Deck
- Stem FXs will always act as Pre-fader, no matter which mode the FX unit is set to.
Important Note :
On Mac OS all the Inputs of the USB Audio Interface may be blocked and you may need to allow access to VirtualDJ. Open Mac System Settings, then click Privacy & Security in the sidebar. (You may need to scroll down.) Click Microphone on the right. Turn access On to the microphone for VirtualDJ
MICROPHONES
The Rane Performer offers 2 Microphone inputs (connections at the rear panel) and various controls at the front panel and top for both of them. Both Microphone inputs are part of the same USB Audio Interface channels, and this dedicated Input is included in VirtualDJ default Audio Setup.
However, the signal of both Microphone Inputs will be directly routed to the Master Output of the Rane Performer, even if this mic Input is not included in Audio Setup.
Why do i need to have this input in Audio Setup ?
There are 2 cases this can be useful :
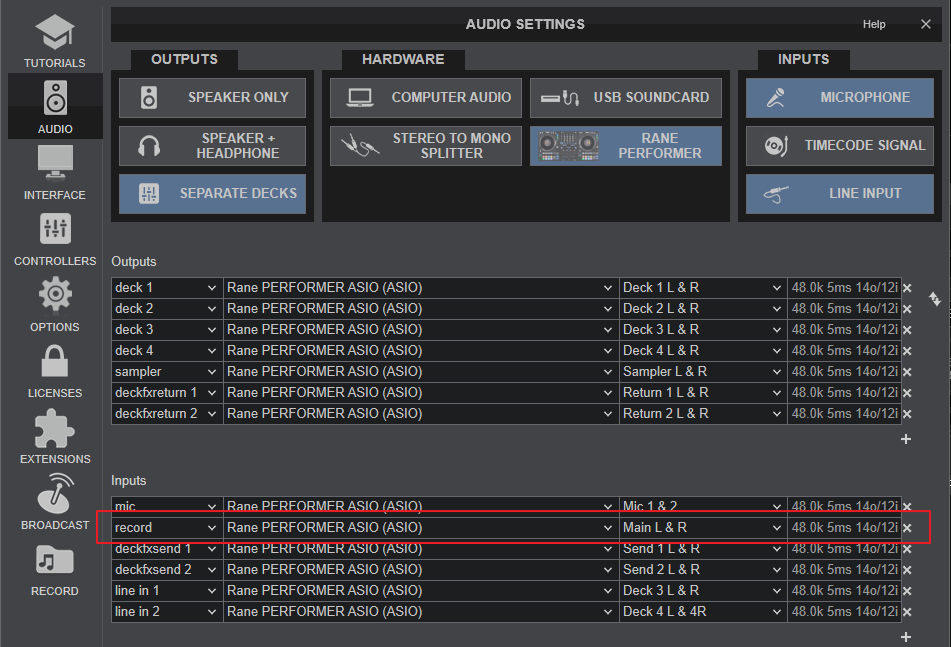
1. To Record the input of the Microphones without recording the entire mix. In this case, open the MASTER Mixer Panel of VirtualDJ GUI and :
- Enable MIC (ON button)
- Use the REC button below the MIC ON button to record the Microphone signal (without the Main mix)
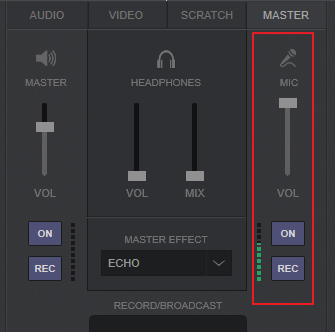
Rane Performer - Record Mic Input
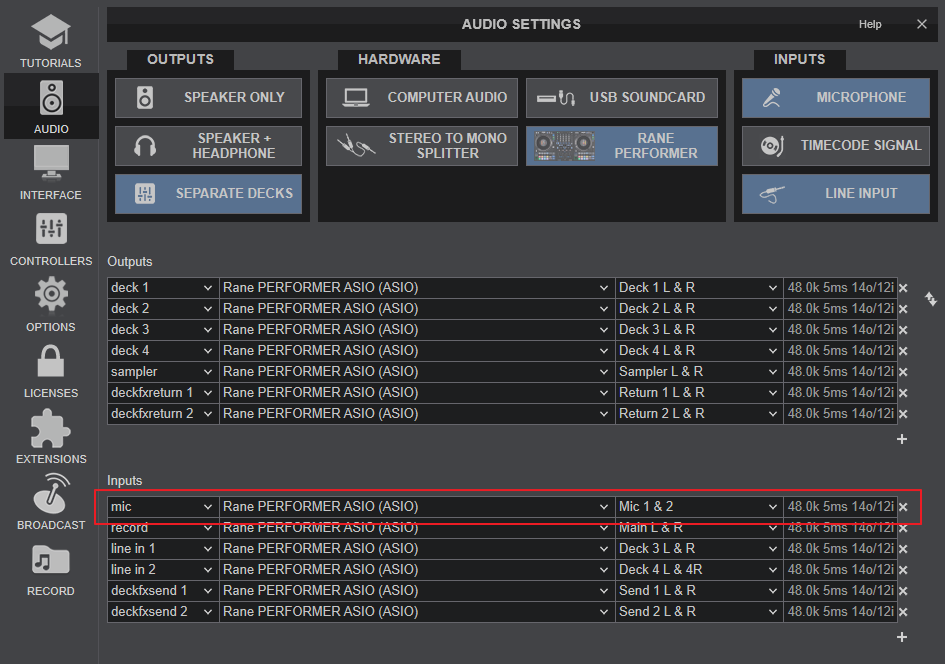
2. To route the Mic Input to a VirtualDJ Deck and apply software Effects. In this case:
- Assign a keyboard or Skin Custom button to the action linein 'mic'
- Press this button to route the Microphone input signal to a VirtualDJ Deck.
- apply any software Effect to the (Mic) Deck.
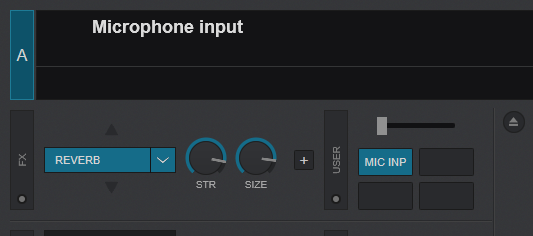
Rane Performer - Deck Mic Input
Note : None of the Mic controls of the device will control mic-related VDJ actions or GUI buttons and vice-versa. Even though all Mic controls of Rane Performer send Midi messages and could be assigned to any VDJ script action, it is strongly advised not to do so, as the hardware operation will still apply.
Timecode (DVS)
VirtualDJ is offering DVS (Digital Vinyl System) support for the Rane Performer. 2 Timecode Inputs are available to control any software decks via Timecode CDs or Vinyls.
The device offers Mixer Channels can accept LINE (Timecode CDs) or PHONO Sources (Timecode Vinyls) depending on the CD/PH switchers at the rear panel of the unit.
- Connect your Timecode devices at the Inputs at rear panel of the Rane Performer
- Open VirtualDJ configuration window and select the AUDIO tab on the left
- Click on the "TIMECODE SIGNAL" button to enable the timecode inputs.
- Click on the "LINE INPUTS" button to disable the Line inputs.
- Your sound setup should be like the one shown on the following image:

Rane Performer Audio Configuration with Timecode Inputs Configured - Click on "Apply" button
- Click on the TIMECODE icon on the left side of configuration window.
- Press PLAY on your timecode CD or Vinyl device and VirtualDJ will automatically detect your Timecode type and make the appropriate adjustments for best performance.
- Click on the ON buttons from the TIMECODE panels of the Default Skin to enable the Timecode control to any Deck.
- Press PLAY on your timecode CD or Vinyl device and VirtualDJ will automatically detect your Timecode type and make the appropriate adjustments for best performance.
- Press the CALIBRATE button if for any reason the signal is not detected (possibly due to reversed phase connections).
Note : When Timecode is enabled and assigned to a VirtualDJ Deck, the motor of this Deck will be disabled and will not affect the Track position or Speed.
Live Inputs
The same Inputs as the one used for Timecodes, can be used as Live Inputs and route their audio signal to a VirtualDJ Deck (to apply Effects etc).
- Connect your Media devices at the rear panel of the Rane Performer to the INPUTS sockets
- Open VirtualDJ configuration window and select the AUDIO tab on the left
- Click on the "LIVE INPUT" button to enable the Live inputs
- Your sound setup should be like the one shown on the following image:
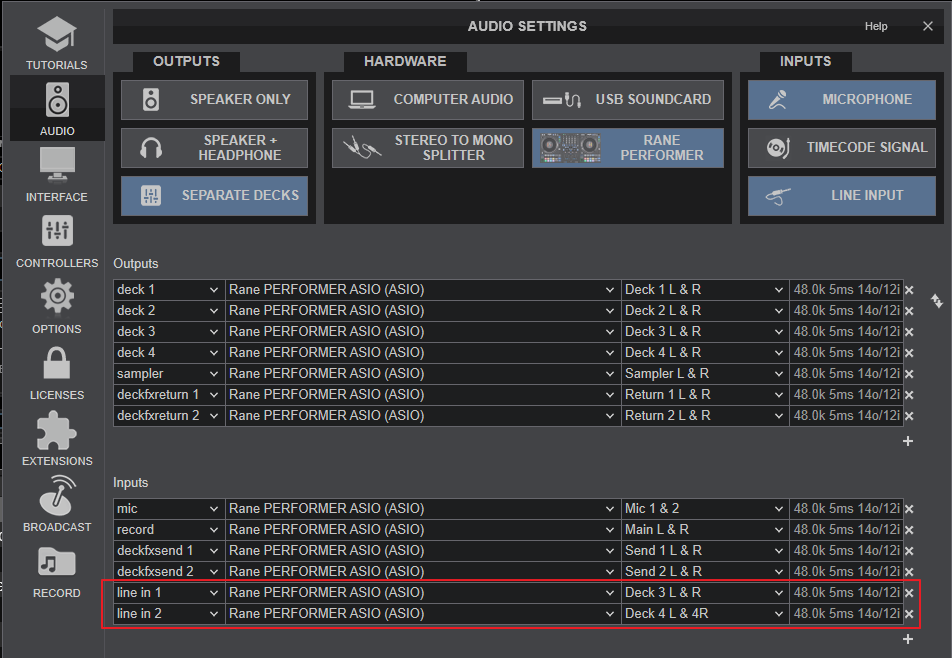
Rane Performer Audio Configuration with Live Inputs - Click on "Apply" button
- Use the top-panel USB/LINE switches to assign these Inputs to Decks 3 or 4.
Notes :
- This is actually the default Audio Setup of the Rane Performer.
- If Timecode inputs were added in audio Setup from previous sessions, make sure you remove those lines from the Audio Setup.
- While Line Inputs are enabled on Decks 3 or 4, the motors will be turned off and will have no affect on these Decks.
Back to back
The Rane Performer has two USB ports, allowing simultaneous connection of two computers. Each port is completely independent. It is possible to run VirtualDJ on one computer and any other DJ-software on the other, Mac or PC.
How to:
- Connect the 2nd computer to the unused USB port on the device.
- Set the Source switcher of the non-playing mixer side to the USB source of the 2nd computer.
- Play a track on this deck and mix it when ready – you ll' now have audio from both computers during the mix.
- Fade out the audio playing from the 1st computer to the audio playing from the 2nd one.
- When only audio from the 2nd computer is left in the mix, remove the first computer.
- Assign the Input Source for the remaining free mixer channel to the 2nd computer and keep mixing.
Recording
The Rane Performer has a dedicated Input to record your Main Mix along with audio signal from any Microphone and/or Auxiliary input. VirtualDJ has pre-configured this input for recording, thus no special setting is required in order to record your mix (including analogue sources and Microphone).
Use the REC or BCAST buttons from the MASTER center panel of the VirtualDJ GUI to Record or Broadcast your mix.