


DDJ-XP1
PAD FX2 (ROLL & SLICER)
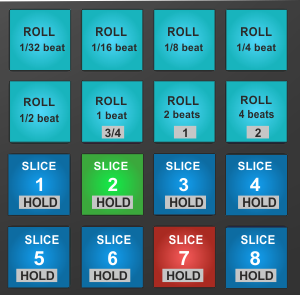
Hold SHIFT down and then press the PAD FX1 mode button to set the PADs to Pad FX2 mode and automatically load the ROLL+SLICER page in the Pads area of the VirtualDJ GUI.
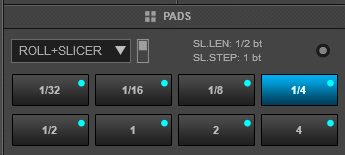
In this mode the upper Pads 1 to 8 trigger a momentary Loop Roll. Once the Pad is released, the track will resume playing from the position it would have been if the Loop Roll was never triggered. The exit point will be visible on the waveform of the VirtualDJ GUI with an additional “running” play marker.
Hold SHIFT to get a ½, ¾, 1 and 2 beats Loop Roll sizes for the pads 5 to 8.
Use the Page menu to apply the Loop Rolls to Video.
The 8 lower pads (9 to16) represent 8 sequential "Slices" in the Beat Grid. The currently playing Slice is represented by the currently green lit pad. The light will move through the pads as it progresses through each 8-Slice phrase. Press a pad to repeat that Slice (hold it down if you want to keep looping it).
Once the Pad is released the track will continue to play from the position it would have been if the pad was never pressed.
Hold SHIFT down and then use the Pads 9 to 16 to repeat the memorized Slices (the Slices played/repeated last time)
Use the PAGE buttons to adjust the length of the Loop applied to the slice. Hold SHIFT[/color] down and then use the PAGE buttons to adjust the step (size) of the Slices
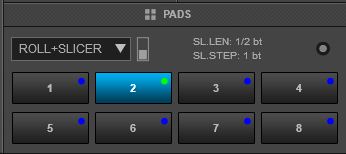
* By default the VirtualDJ GUI will show Pads 1 to 8. Hold SHIFT and then press the PAD FX1 mode button to toggle between the Pads 1-8 and Pads 9-16 views. Note that the Pads 9-16 view on the GUI will only be available when the Pioneer DDJ-XP1 is connected.
Read further details about Pads in the VirtualDJ 8 manual BeatLoop