


 cstoll
- Numark V7 -
Until the next update release - download and use this definition:
- Removed - V7s are now natively supported - no downloading of definitions necessary
- Drivers -
Install the latest drivers for your appropriate OS bit version -
** First recommend installing the latest version of Itch to get any firmware updates and the latest drivers. However you can get the latest AUDIO Only drivers from the Numark site. Firmware upgrades are only available by installing ITCH.
You do not need to install these drivers if you have installed the latest version of ITCH.
Windows 64-bit - http://www.numark.com/content255772.html
Windows 32-bit - http://www.numark.com/content252076.html
Mac OSX - http://www.numark.com/content258500.html
SINGLE UNIT
Windows
Install the V7 - Run the driver install and follow the steps of the installer - use the drivers from the Numark site above.
After the restart and back at Windows - Open VirtualDJ go to the Config - Sound card setup
Select -
Click OK to return to the VirtualDJ interface.
Mac OSX
Install the V7 - Run the driver install and follow the steps of the installer - use the drivers from the Numark site above.
After the restart and back at OSX - Power On the V7
Open VirtualDJ go to the Config - Sound card setup
Select -
Click OK to return to the VirtualDJ interface.
TWO UNITS
Windows
Install your first V7 (left) - Run the driver install and follow the steps of the installer - use the drivers from the Numark site above.
After the restart and back at Windows -
Connect the 2nd V7 (right) using the following connection - DO NOT use the USB connection.
Open VirtualDJ go to the Config - Sound card setup
Select -
Click OK to return to the VirtualDJ interface.
Mac OSX
Install the first V7 (Left) - Run the driver install and follow the steps of the installer - use the drivers from the Numark site above.
After the restart and back at OSX - Power On the Left V7
Connect the 2nd V7 (right) using the following connection - DO NOT use the USB connection.
Open VirtualDJ go to the Config - Sound card setup
Select -
Click OK to return to the VirtualDJ interface.
Hope these steps help and get you up and running - happy mixing :)
Here is a quick video to help you see that it all works :) Using VirtualDJ Pro on Mac OSX Snow Leopard (10.6.4)
Until the next update release - download and use this definition:
- Removed - V7s are now natively supported - no downloading of definitions necessary
- Drivers -
Install the latest drivers for your appropriate OS bit version -
** First recommend installing the latest version of Itch to get any firmware updates and the latest drivers. However you can get the latest AUDIO Only drivers from the Numark site. Firmware upgrades are only available by installing ITCH.
You do not need to install these drivers if you have installed the latest version of ITCH.
Windows 64-bit - http://www.numark.com/content255772.html
Windows 32-bit - http://www.numark.com/content252076.html
Mac OSX - http://www.numark.com/content258500.html
SINGLE UNIT
Windows
Install the V7 - Run the driver install and follow the steps of the installer - use the drivers from the Numark site above.
After the restart and back at Windows - Open VirtualDJ go to the Config - Sound card setup
Select -
- Inputs - None
- Outputs - External Mixer (Left Deck - Chan 1&2 / Right Deck - Chan 3&4)
- Sound Card - ASIO
- Select the V7 USB Audio Device as the soundcard with Ultra-latency ASIO checked
- Click Apply
Click OK to return to the VirtualDJ interface.
Mac OSX
Install the V7 - Run the driver install and follow the steps of the installer - use the drivers from the Numark site above.
After the restart and back at OSX - Power On the V7
Open VirtualDJ go to the Config - Sound card setup
Select -
- Inputs - None
- Outputs - External Mixer (Left Deck - Front Output / Right Deck - Rear Output)
- Sound Card - 4-Out
- Select the Numark V7 as the soundcard
- Click Apply
Click OK to return to the VirtualDJ interface.
TWO UNITS
Windows
Install your first V7 (left) - Run the driver install and follow the steps of the installer - use the drivers from the Numark site above.
After the restart and back at Windows -
Connect the 2nd V7 (right) using the following connection - DO NOT use the USB connection.
- Run the Link cable from left to right
- Put the left V7 in MASTER and Deck Select on A
- Put the right V7 Deck Select on B and press the MASTER button so it is OFF
- Switch the Deck Position switches on the back to the appropriate position settings (Left < Left || Right > Right)
- Connect your RCA Audio cables from the LEFT V7 to your mixer - you can only use 1 Deck as the Audio Output.
Open VirtualDJ go to the Config - Sound card setup
Select -
- Inputs - None
- Outputs - External Mixer (Left Deck - Chan 1&2 / Right Deck - Chan 3&4)
- Sound Card - ASIO
- Select the V7 USB Audio Device as the soundcard with Ultra-latency ASIO checked
- Click Apply
Click OK to return to the VirtualDJ interface.
Mac OSX
Install the first V7 (Left) - Run the driver install and follow the steps of the installer - use the drivers from the Numark site above.
After the restart and back at OSX - Power On the Left V7
Connect the 2nd V7 (right) using the following connection - DO NOT use the USB connection.
- Run the Link cable from left to right
- Put the left V7 in MASTER and Deck Select on A
- Put the right V7 Deck Select on B and press the MASTER button so it is OFF
- Switch the Deck Position switches on the back to the appropriate position settings (Left < Left || Right > Right)
- Connect your RCA Audio cables from the LEFT V7 to your mixer - you can only use 1 Deck as the Audio Output.
Open VirtualDJ go to the Config - Sound card setup
Select -
- Inputs - None
- Outputs - External Mixer (Left Deck - Front Output / Right Deck - Rear Output)
- Sound Card - 4-Out
- Select the Numark V7 as the soundcard
- Click Apply
Click OK to return to the VirtualDJ interface.
Hope these steps help and get you up and running - happy mixing :)
Here is a quick video to help you see that it all works :) Using VirtualDJ Pro on Mac OSX Snow Leopard (10.6.4)
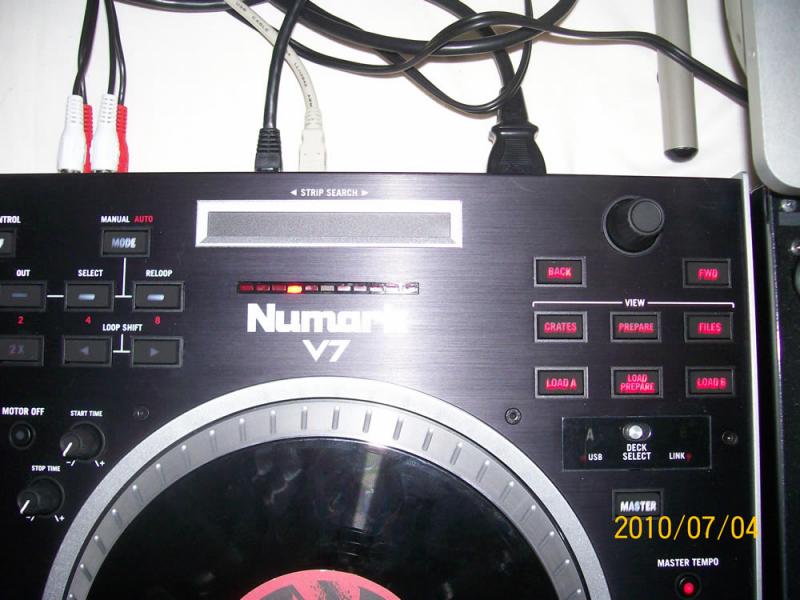
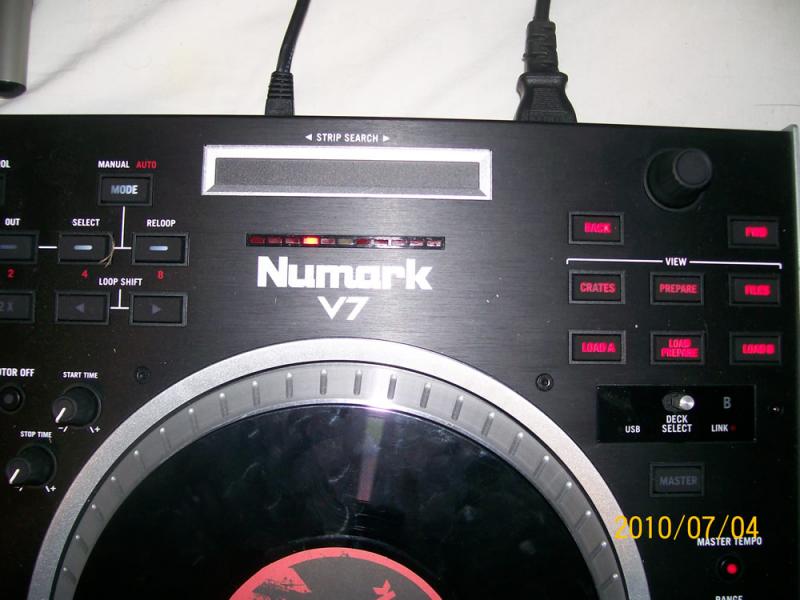
Some pics --
Deck A - note the connections and the Deck Select is on A with MASTER lit with LINK light ON
Deck B - note the Link cable and Power cable are the only thing connected, Deck Select is on B, MASTER is OFF with LINK light ON
Posted Sat 03 Jul 10 @ 3:10 pm


