


DJ-505
ADVANCED SETUP
MICROPHONE
The signal of the Microphone Input is directly routed to the Master Output of the Roland DJ-505 and it is also included in the special Record Input, so you will find that the Microphone is working properly (and recorded as well), regardless if you have enabled this via the MIC ON button from the Master panel of VirtualDJ or not, or even if you exclude the "mic" line from the default audio configuration of VirtualDJ.
The microphone input is necessary to be included in the Audio setup and enabled from the ON button in VirtualDJ, only in case you need to apply software Effects to this input.
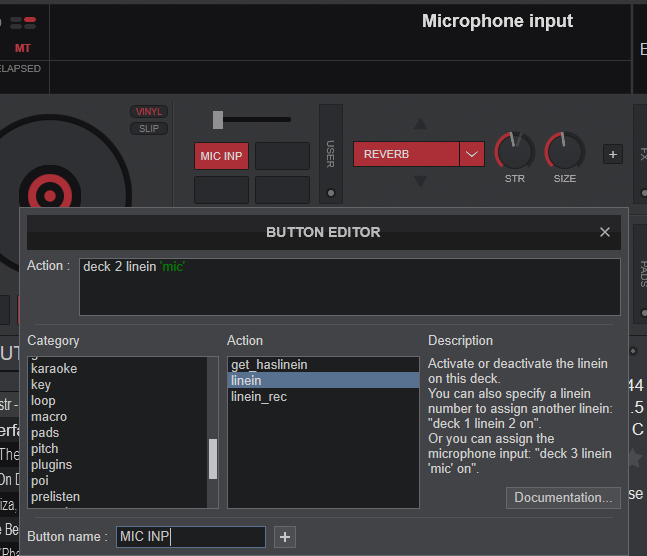
In order to do this, you will need to route the Microphone input to a VirtualDJ deck, by assigning the action deck x linein 'mic' (where x is the number of the deck that you wish to route the mic to) to a keyboard/custom button
STAND-ALONE - EXTERNAL LINE/PHONO INPUTS
Audio from devices such as a DJ player or turntable (analog) can be input directly to the rear panel INPUT (CH 1 & CH 2) RCA sockets, and mixed by the DJ505’s mixer section. The input is routed to a VirtualDJ deck*, so you can also apply VirtualDJ effects to the external audio inputs and also include to your recording via VirtualDJ.
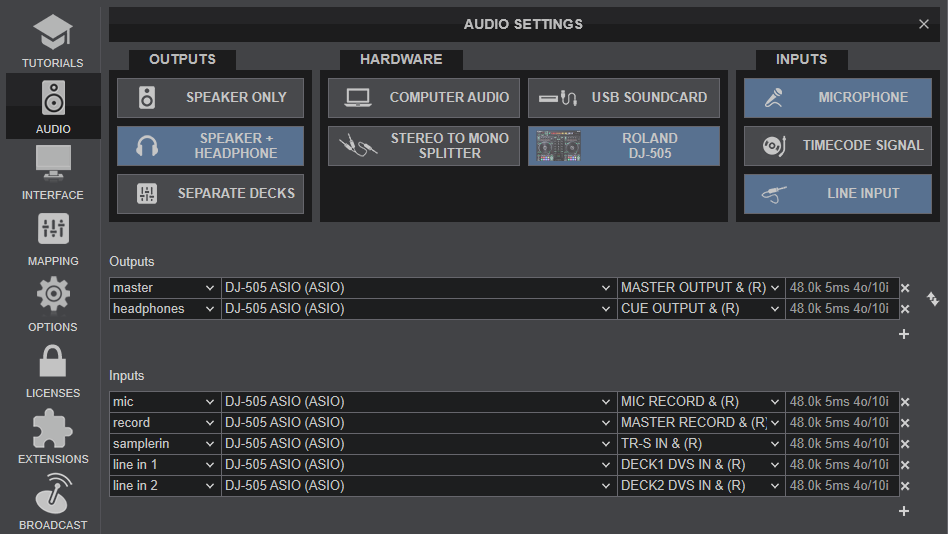
For that you will need to open Audio Setup of VirtualDJ and click on the LINE INPUT button at the top, so that VirtualDJ automatically adds 2 linein lines in your Audio Setup. Press APPLY.
*Note : Line Inputs and Timecode (DVS) require a Pro Infinity or a Pro Subscription license
- Connect your media source to any of the INPUT CH RCA sockets.
- Use the
knob and channel fader to adjust the output level - You can use the [HI], [MID], and [LOW] knobs to adjust the volume of the high, mid, and low-frequency regions.
- You can use the [CHANNEL FX] buttons to apply effects.
- You can operate the effect section to apply VirtualDJ effects.
When a Channel is set back to PC, the track which was loaded when the same channel was set to LINE/PHONO, will be loaded again.
TIMECODE (DVS)
The audio interface of the Roland DJ-505 offers 2 stereo inputs, that can be used as Timecode Inputs (DVS)*.
- Connect your DVS unit (CD player with Timecode CD or turntable with Timecode Vinyl) to the appropriate INPUT at the rear panel. Note that a combination of both DVS signal types cannot be used. You will need to use either 2 Timecode Vinyl or 2 Timecode CDs.
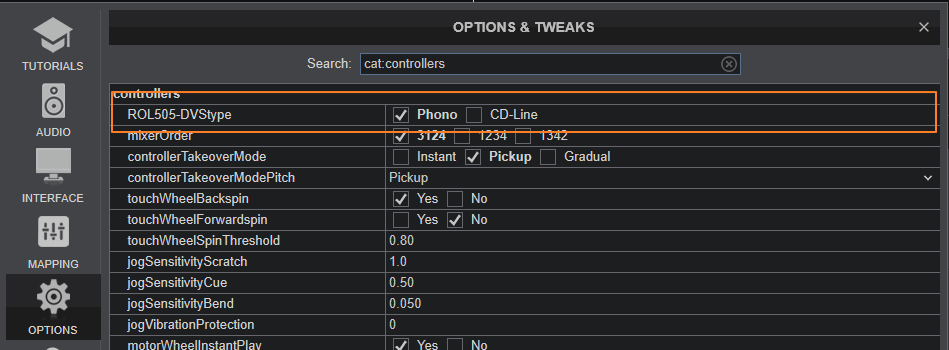
- Select your Timecode Input type, from the OPTIONS tab of VirtualDJ Settings. Selection is saved across sessions.
- Set the INPUT SELECT of this channel set to USB/PC at the front panel.
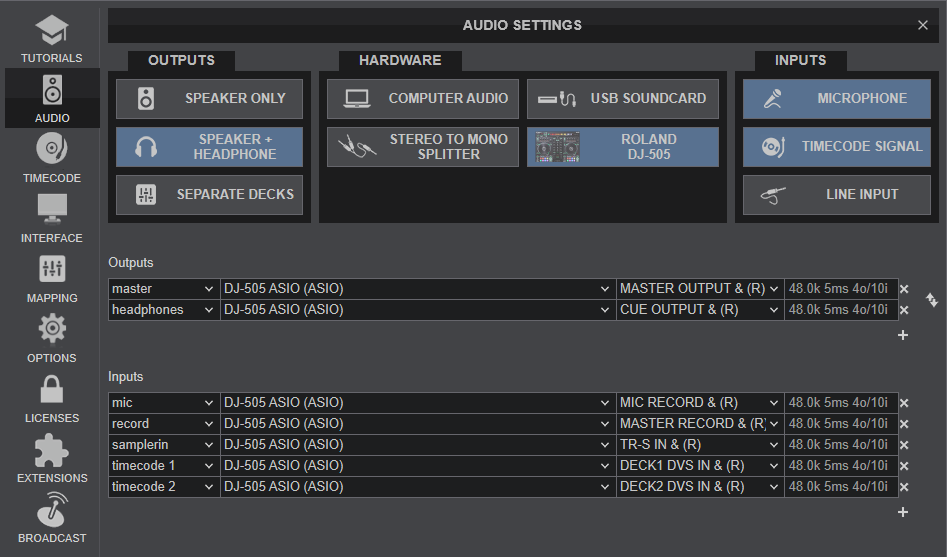
- Remove the Line In lines from Audio Setup (if added) and press the TIMECODE button in the Audio Setup of VirtualDJ so that the 2 Timecode lines are added to Audio Setup
- press APPLY
- Use the TIMECODE ON buttons from VirtualDJ GUI to select on which VirtualDJ deck your Timecode signal will apply to
In the following example we are using the 2 mixer channels for DVS
*Note : Line Inputs and Timecode (DVS) require a Pro Infinity or a Pro Subscription license
