


DJM-850
LAYOUT
U. USB Use a USB cable to connect the DJM-850 with a USB port of your computer and allow DJM-850 to send and receive audio and Midi signals
M. MIDI. Press this button to enable the MIDI Operation of the DJM-850. Once VirtualDJ is connected, press the MIDI START/STOP button for 2 seconds and a MIDI snapshot will be sent from the DJM-850 (the position of the faders and knobs of the DJM-850 will be reported to VirtualDJ)
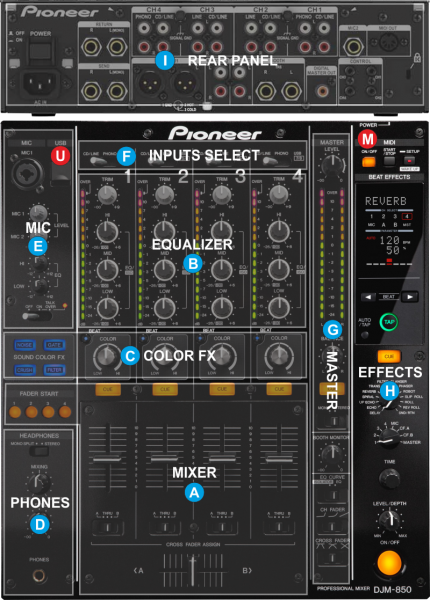
Even though the Pioneer DJM-850 is capable of sending MIDI signals from all faders, buttons and knobs, the entire unit is not controlling the internal mixer of VirtualDJ. The audio mixing and the Effects are operated from the hardware.
The Crossfader, Equalizer, Filter, Volume faders etc. will move the relative faders of the VirtualDJ GUI, but not vice versa (Fake mixer mode)
The functionality of each button, knob and connection per section (as shown in the image above) will be explained in detail in the next chapters
A. Mixer Controls
B. Equalizer
C. Color FX
D. Headhones Controls
E. Microphone Controls
F. Inputs/Source Selects
G. Master section
H. Hardware Effects
I. Rear Panel
Mixer