


Launchpad MKII
CONTROLS
The default mapping of the unit for VirtualDJ offers 7 different pages and those can be selected by using the first 7 vertical round buttons of the right side of the unit.
The very bottom round button is used as SHIFT to offer secondary actions (marked with white background in the following pictures)
Pages 1 to 4 have pre-selected VirtualDJ actions. Pages 5 to 7 are unassigned to allow you creating your own custom pages with the needed actions depending on your mixing style.
See more details in Advanced Setup section.
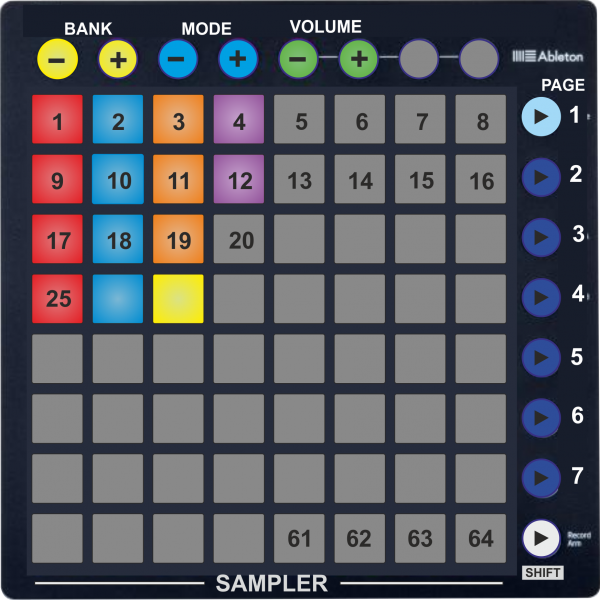
Page 1 - Sampler
Press the 1st Vertical round button to select the Sampler page (led will become cyan). The Sampler page will be automatically selected each time you launch VirtualDJ.
The 64 Pads trigger Samples 1 (top-left button) to 64 (bottom-right button) from the selected Sampler Bank.
Normally the Leds of the Pads will have the assigned color of each Sample.
In most cases, when the Sample plays, the color of the Led will have more brightness. Led will be off if a Sampler slot is unassigned (empty)
Hold SHIFT and then press the same Pad to stop the sample (useful if the Unmute or Stutter Trigger mode is selected).
Use the top round buttons to select the next/previous Sampler Bank, the next/previous Sampler Trigger mode (On/off, Stutter, Hold and Unmute) and adjust the Master Volume of the Sampler.
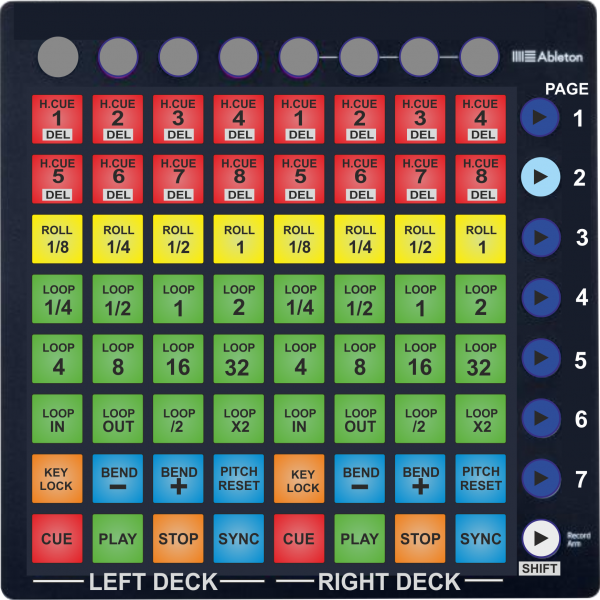
Page 2 - Deck Controls
Press the 2nd Vertical round button to select the Deck Controls page (led will become cyan).
The 64 Pads offer Transport, Tempo, Loop, Loop Roll and HotCues functions as per the image below (left side for left deck and right side for right deck).
Hold SHIFT down and then use the Pads at the 2 top rows to delete the assigned HotCues for the left/right decks.
The top round buttons are unassigned.
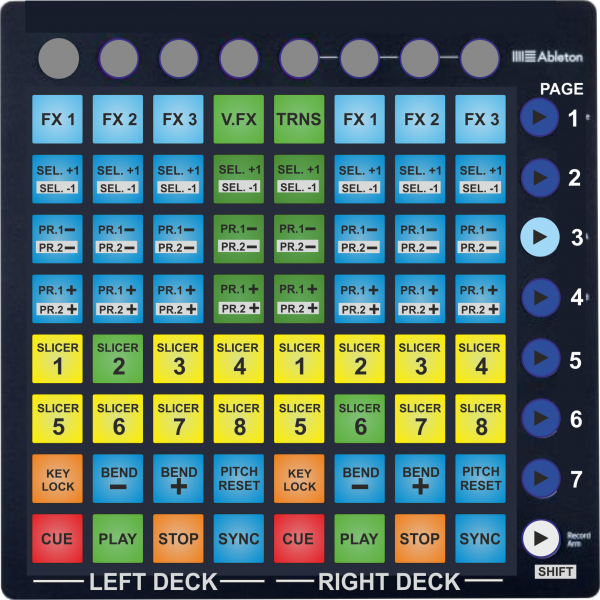
Page 3 - Effects
Press the 3rd Vertical round button to select the Effects page (led will become cyan).
The 64 Pads offer Transport, Tempo, Slicer, Effects and Video FX and Transition functions as per the image below (left side for left deck and right side for right deck)
Hold SHIFT down and then use the Pads to get the secondary functions (labeled with white background as per the image)
The top round buttons are unassigned.
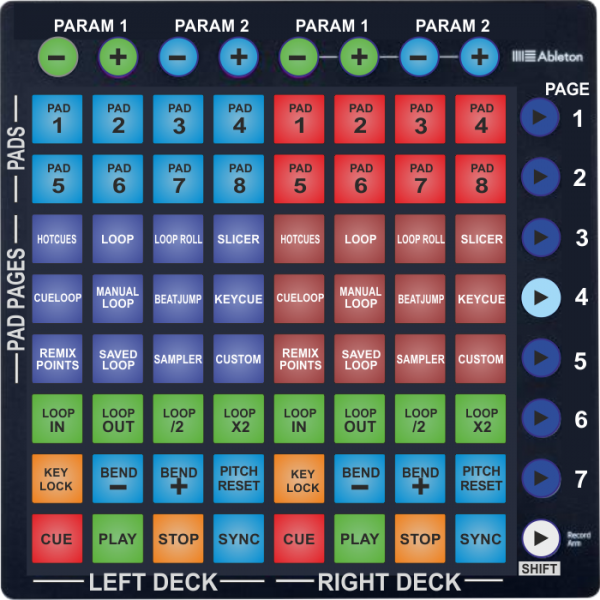
Page 4 - Pads
Press the 4th Vertical round button to select the Pads page (led will become cyan).
The Pads of the lower 3 rows offer Transport, Tempo and Loop controls for Left and Right decks, exactly like Pages 2 and 3,
The top 2 rows control the Pads 1-8 of the selected Page. The funtionality of each pad depends on the selected Pads page. Hold SHIFT and then press any of the Pads to get the assigned shift-action (e.g. SHIFT+PAD1 to delete the Hotcue 1 when the Hotcues Pads page is selected)
Use the buttons on rows 3, 4 and 5 to select a Page for the pads (all the currently default Pads pages are included).
Use the Top Horizontal round buttons to adjust the Parameters of the selected Pads Page (if available)
Custom Setup